Injection Grouting Inspection Checklist for Project Teams
Use this injection grouting inspection checklist to verify pre-work, injection parameters and post-work tests so grouting meets design and is documented.

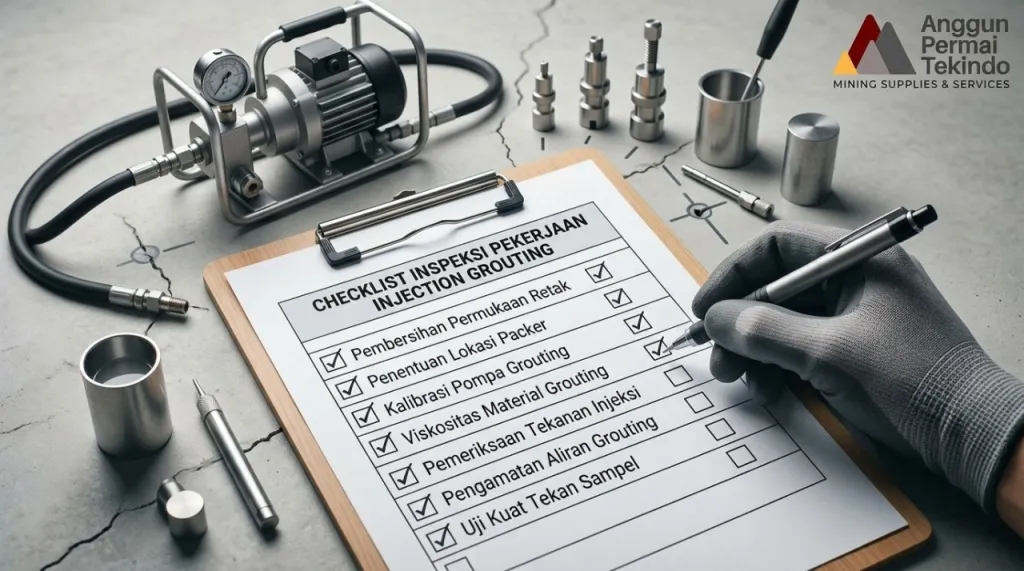
An injection grouting inspection checklist covers three stages: before the work (soil data, materials, equipment, health and safety), during injection (pressure, volume, flow rate, grout quality, surface movement), and after the work (result testing and documentation). Project teams use it to make sure grouting follows the design, is safe, and is fully documented.
Contents
- Key Takeaways
- Introduction
- What Is Injection Grouting Inspection?
- Roles in the Project Team
- Injection Grouting Inspection Checklist
- Recommended Grouting Log Format
- Supporting Technical Data and Facts
- Case Studies (Illustrative Applications)
- Pros and Cons of Using an Inspection Checklist
- Practical Tips and Recommendations
- FAQ (Frequently Asked Questions)
- Conclusion
Key Takeaways
- Injection grouting inspection is a systematic check of preparation, execution, and results to confirm the grouting meets the design and specifications.
- Three checklist stages: pre-work, during injection, and post-work.
- Key parameters during injection: pressure, grout volume, flow rate, mix quality, and surface movement.
- Required documents: the inspection and test plan (ITP), grouting log, daily reports, and test results.
- Checkpoints (hold points and witness points) determine when work may proceed.
- Safety follows the Construction Safety Management System (SMKK, Indonesia's construction safety framework).
- Without records, grouting cannot be proven. Field data is the basis for accepting the work.
Introduction
In injection grouting, the real result happens underground, out of sight. That is why quality can only be confirmed through disciplined inspection and record keeping. Small mistakes such as excess pressure, an inconsistent mix, or a missed injection point can make the grouting fail, waste material, or damage nearby structures.
Many projects end up in disputes because field data is incomplete: grout volumes were not logged, pressures were not documented, or result tests were never carried out. An inspection checklist helps the project team, from field supervisors, QA/QC, and site engineers to project managers, keep the work under control and accountable.
This article presents a practical injection grouting inspection checklist, with supporting data, worked examples, and tips. It is general guidance. Final procedures must follow your project's specifications, design, and the approval of a geotechnical expert.
What Is Injection Grouting Inspection?
Injection grouting inspection is a series of checks on preparation, the injection process, and the final result to confirm that grouting is carried out according to the design, specifications, and safety requirements.
Inspection covers three things:
- Preparation verification: data, materials, equipment, and personnel are ready.
- Execution oversight: injection parameters are recorded and controlled.
- Result verification: testing proves the design objectives were achieved.
Roles in the Project Team
| Role | Inspection responsibility |
|---|---|
| Geotechnical designer | Sets the design, parameters, and acceptance criteria |
| Site engineer / contractor's work lead | Carries out the work according to the design and procedures |
| Supervisor / QA-QC | Inspects, witnesses, and records parameters and test results |
| Grouting operator | Runs the pump and records pressure, volume, and flow rate |
| Safety officer (K3 / SMKK) | Ensures workplace safety and environmental protection |
| Owner or supervising consultant | Approves hold points and accepts the work |
Injection Grouting Inspection Checklist
Stage 1: Pre-Work Checklist
Purpose: make sure everything is ready before injection begins.
| No | Inspection item | Status |
|---|---|---|
| 1 | Ground investigation data (boreholes, SPT or CPT, laboratory tests) is available and matches the design | ☐ |
| 2 | Design drawings, specifications, and ITP are approved | ☐ |
| 3 | Grouting type, point pattern, depth, pressure, and design volume are known to the whole team | ☐ |
| 4 | Refusal criteria, pressure limits, and volume limits are defined | ☐ |
| 5 | Injection point positions are surveyed and marked | ☐ |
| 6 | Underground utilities and surrounding structures are mapped | ☐ |
| 7 | Quality certificates or data for cement, additives, and chemicals are available | ☐ |
| 8 | Drilling rig, pump, mixer, packers, and pipes are in good condition and calibrated | ☐ |
| 9 | Pressure gauges and flow meters are calibrated | ☐ |
| 10 | Trial grouting plan is available if required | ☐ |
| 11 | Movement monitoring points (survey pegs, tiltmeters, crack gauges) are installed and baseline readings taken | ☐ |
| 12 | Health and safety plan (K3 / SMKK) is in place and a safety briefing has been held | ☐ |
| 13 | Handling of waste, grout spillage, and drilling water is planned | ☐ |
| 14 | Grouting log and daily report formats are ready | ☐ |
Stage 2: Checklist During Execution
Purpose: control injection parameters and grout quality in real time.
A. Drilling and pipe installation
| No | Inspection item | Status |
|---|---|---|
| 1 | Hole position, angle, and depth match the drawings | ☐ |
| 2 | Soil or rock conditions encountered are recorded and compared with the design data | ☐ |
| 3 | Drilling water loss or voids encountered are recorded | ☐ |
| 4 | Injection pipes, packers, or sleeves (manchettes) are installed as planned | ☐ |
| 5 | Holes are cleaned before injection if required | ☐ |
B. Grout mix quality
| No | Inspection item | Status |
|---|---|---|
| 1 | Water-cement ratio and composition match the design | ☐ |
| 2 | Mixing sequence and time follow the procedure | ☐ |
| 3 | Grout density is checked at regular intervals | ☐ |
| 4 | Viscosity is checked (for example with a Marsh funnel) if required | ☐ |
| 5 | Bleeding and setting time are checked according to the specification | ☐ |
| 6 | Test specimens (for example cubes or cylinders) are made for compressive strength testing | ☐ |
| 7 | Grout past its pot life is not used | ☐ |
C. Injection parameters
| No | Inspection item | Status |
|---|---|---|
| 1 | Injection pressure does not exceed the design limit | ☐ |
| 2 | Grout volume per point or zone is recorded | ☐ |
| 3 | Flow rate is recorded and matches the plan | ☐ |
| 4 | Injection sequence (primary, secondary, tertiary) is followed | ☐ |
| 5 | Refusal criteria are applied according to the specification | ☐ |
| 6 | Pressure and volume readings are recorded continuously or at set intervals | ☐ |
| 7 | Anomalies (sudden pressure drop, grout surfacing, leaks) are recorded and reported | ☐ |
D. Monitoring the surroundings and nearby structures
| No | Inspection item | Status |
|---|---|---|
| 1 | Surface or structure movement is read during injection | ☐ |
| 2 | Alert limits and stop-work limits are known to the whole team | ☐ |
| 3 | Grout leakage into drains, utilities, or neighboring land is checked | ☐ |
| 4 | New cracks or changes in nearby buildings are documented | ☐ |
E. Safety and environment
| No | Inspection item | Status |
|---|---|---|
| 1 | Full PPE is available and worn (helmet, goggles, gloves, boots) | ☐ |
| 2 | High-pressure hoses and connections are inspected and the surrounding area is secured | ☐ |
| 3 | Safety data sheets for chemicals are available | ☐ |
| 4 | Grout waste and drilling water are managed according to plan | ☐ |
Stage 3: Post-Work Checklist
Purpose: prove the grouting meets the design criteria and complete the documentation.
| No | Inspection item | Status |
|---|---|---|
| 1 | All injection points are completed according to the drawings, with none missed | ☐ |
| 2 | Total actual grout volume is compared with the design volume | ☐ |
| 3 | Compressive strength results for the grout specimens are available | ☐ |
| 4 | Result tests are carried out according to the specification (repeat SPT or CPT, permeability or Lugeon tests, core samples, load tests) | ☐ |
| 5 | Test results are compared with the acceptance criteria | ☐ |
| 6 | Final movement monitoring readings are available | ☐ |
| 7 | Holes and pipes are sealed or given final grouting as designed | ☐ |
| 8 | Grouting log, daily reports, and official work records (berita acara) are complete and signed | ☐ |
| 9 | Photo documentation from before, during, and after the work is available | ☐ |
| 10 | The work area is cleaned and waste is managed | ☐ |
| 11 | Recommendations for follow-up monitoring (if any) are passed to the owner | ☐ |
Recommended Grouting Log Format
A grouting log is a technical record for each injection point and serves as the main evidence of execution. The recommended minimum contents are:
- Point number, coordinates, date, and start and finish times.
- Depth of the injection zone or stage.
- Grout type and composition, and water-cement ratio.
- Pressure (initial, maximum, final), grout volume, and flow rate.
- Special conditions: drilling water loss, grout surfacing, leaks.
- Surface or structure movement readings.
- Names and signatures of the operator and supervisor.
Supporting Technical Data and Facts
The following are general references. Final values and procedures follow the project specifications and design.
- Pressure control. Excess pressure can lift the ground surface or fracture the soil. For this reason, pressure limits and movement monitoring are written into the design.
- Injection sequence. In rock grouting, primary, secondary, and tertiary points are commonly used so effectiveness can be evaluated step by step.
- Lugeon test. One Lugeon is roughly 1 liter per minute per meter of borehole at a pressure of 10 bar. The test is commonly used to assess rock permeability before and after grouting.
- Grout quality tests. Checks of density, viscosity (for example with a Marsh funnel), bleeding, setting time, and specimen compressive strength are commonly used for cement grout.
- Compaction grout has a low slump, generally below about 5 cm.
- Result verification. Success is evaluated with tests before and after treatment, for example repeat SPT or CPT, permeability tests, and core sample tests.
- Construction safety. Construction safety in Indonesia follows the Construction Safety Management System (SMKK) under regulations of the Ministry of Public Works and Housing.
- Design references. SNI 8460 on geotechnical design requirements, the FHWA's Ground Improvement Methods, and USACE manuals on grouting technology.
- Legal basis. Construction work is governed by the Construction Services Law (Law No. 2 of 2017), which requires construction safety and qualified expert personnel.
Case Studies (Illustrative Applications)
Note: The scenarios below are illustrations based on common practice. They are not data from any specific project.
Case 1: Floor heave during compaction grouting
Situation: Compaction grouting is carried out beneath a warehouse floor. At the 12th point, survey peg readings show the floor rising past the alert limit.
Action: The operator stops injection at the stop-work limit set in the checklist, the supervisor records the event, and the designer evaluates the situation before work resumes with pressure and volume per stage adjusted.
Lesson: Alert and stop-work limits known to the whole team prevent floor damage.
Case 2: Seepage in a rock foundation and repeat water testing
Situation: Curtain grouting is carried out in a rock foundation. After the primary points are finished, pressurized water tests at intermediate points show permeability is still high in one zone.
Action: The team adds secondary and tertiary points in that zone according to the ITP, then repeats the tests.
Lesson: Sequenced injection and staged testing help find weak zones without waiting for the work to finish.
Case 3: Volume discrepancy without records
Situation: Actual grout volume is far above the design volume, but the grouting log is incomplete, so the cause is hard to trace.
Lesson: Records per point and per stage help determine whether grout went into voids, leaked into utilities, or a mixing error occurred. Without a log, cost disputes are hard to resolve.
Pros and Cons of Using an Inspection Checklist
Advantages
- Standardizes inspections across personnel and shifts.
- Reduces the risk of missed points and unrecorded parameters.
- Provides quality evidence for work acceptance and claims.
- Speeds up anomaly detection so corrective action is faster.
- Supports health and safety compliance and audit documentation.
Disadvantages and limitations
- A checklist does not replace the judgment of a geotechnical expert.
- A generic checklist must be adapted to the grouting type and project specifications.
- Box-ticking without field verification gives no quality assurance.
- Manual records are prone to error. Automatic recording (loggers) can help but needs calibration.
- It takes time and team discipline, especially on projects with tight schedules.
Practical Tips and Recommendations
- Align the checklist with the project ITP. Add items for the grouting type (permeation, compaction, fracture, chemical, or jet).
- Set hold points and witness points. Define which stages must be witnessed or approved before work continues.
- Define alert and stop limits from the start. Post them on the site information board and cover them in daily briefings.
- Use calibrated instruments. Keep the calibration certificates for pressure gauges and flow meters.
- Consider a data logger. Automatic recording of pressure, volume, and flow rate reduces manual errors.
- Record anomalies immediately. Write down the time, the point, and the action taken.
- Hold daily briefings. Cover targets, risks, and stop limits.
- Compare actual volume with the design every day. A large gap is a signal to review.
- Document with photos. Include point labels and dates.
- Involve the geotechnical designer when anomalies occur. Do not change parameters without approval.
FAQ (Frequently Asked Questions)
What is an injection grouting inspection checklist?
An injection grouting inspection checklist is a list of checks that project teams use to confirm that preparation, execution, and results meet the design, specifications, and safety requirements.
What should be checked before injection grouting starts?
Check the ground investigation data, design and ITP, injection stop criteria, point positions, surrounding utilities, material quality, equipment calibration, movement monitoring points, and the health and safety plan.
What parameters are recorded during injection?
The main parameters are pressure, grout volume, flow rate, mix composition and quality, injection sequence, and movement of the surface or surrounding structures.
How do you prove injection grouting worked?
Success is proven with result tests such as repeat SPT or CPT, permeability or Lugeon tests, core sample tests, and load tests, along with volume data and movement monitoring that compare conditions before and after.
What is a grouting log?
A grouting log is a technical record for each injection point or stage that captures pressure, volume, flow rate, grout type, special conditions, and signatures. It is the main evidence of execution.
What are hold points and witness points?
A hold point is a stage that cannot proceed until the responsible party approves it. A witness point is a stage that interested parties may observe, and work can continue if they do not attend, as set out in the ITP.
What should you do if pressure suddenly rises or grout surfaces?
Stop injection at the stop-work limit, record the event, secure the area, and report to the supervisor and geotechnical designer before resuming with re-evaluated parameters.
Who is responsible for grouting inspection?
Responsibility is shared: the contractor carries out the work, the supervisor or QA/QC inspects and records, the geotechnical designer sets the criteria, and the owner or supervising consultant approves hold points and accepts the work.
Conclusion
An effective injection grouting inspection checklist covers three stages, pre-work, during injection, and post-work, and focuses on injection parameters, grout quality, movement monitoring, safety, and documentation. With a checklist, project teams can control quality and prove the results of work that cannot be seen underground.
The checklist still has to be adapted to project specifications and combined with the judgment of a geotechnical expert. Disciplined record keeping, equipment calibration, and clear stop-work limits are what keep grouting safe, efficient, and accountable.
Geotechnical Partner for Contractors: Contact APTEKINDO
APTEKINDO supports contractors, developers, and industrial clients across Indonesia in planning, executing, and controlling the quality of injection grouting and ground improvement work.
Here is how we can help your project team:
- ITP and inspection checklist preparation tailored to the grouting type and project specifications.
- Technical assistance and field supervision to ensure execution follows the design.
- Field data evaluation such as grouting logs, volumes, and test results.
- Consultation on ground investigation and method selection for ground improvement.
- Technical briefings and training for field teams: [adjust to APTEKINDO's services].
Easy steps to get started:
- Contact us at 021-52920671 or [email protected].
- Send a project summary: location, type of work, ground conditions, and the challenges you face.
- Schedule a technical consultation to discuss your inspection and project support needs.
Get a technical consultation for your project from APTEKINDO today.